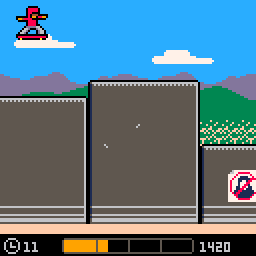
Open the borders! Tear down the US-Mexico wall with GambiCon03 and your jet skateboard.
What can I play with a GambiCon03?
The logic behind the controller is compatible with any game that uses 2 discrete gamepad face buttons. However, the controller was designed specifically for Sk8Border, a game created for the Anti-Fascist Game Jam by Leif Halldór Ásgeirsson, Marc-André Toupin and Ben Wiley. In it, you destroy the US-Mexico border wall by skating on it with a jet skateboard.
Do-it-yourself
Here you can find a full list of materials, diagrams and detailed step-by-step instructions for making your own GambiCon03.
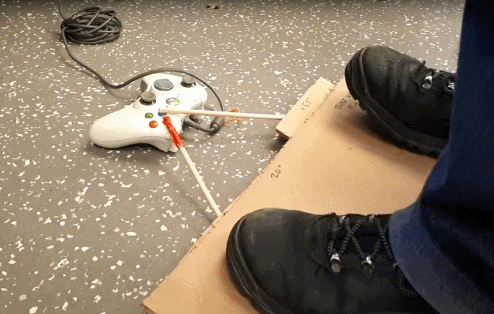
This controller has two main components: a skateboard deck which the player activates wth their feet and two pedal levers which are moved by the deck and press the gamepad buttons. You can use any gamepad: I used an XBox 360 controller because I already had one and its compatible with PICO-8, the tool used to make Sk8Border.

The skateboard deck
This is the top layer which the player will be stepping on. It needs to be as resistant as it is customized!
Material & equipment list
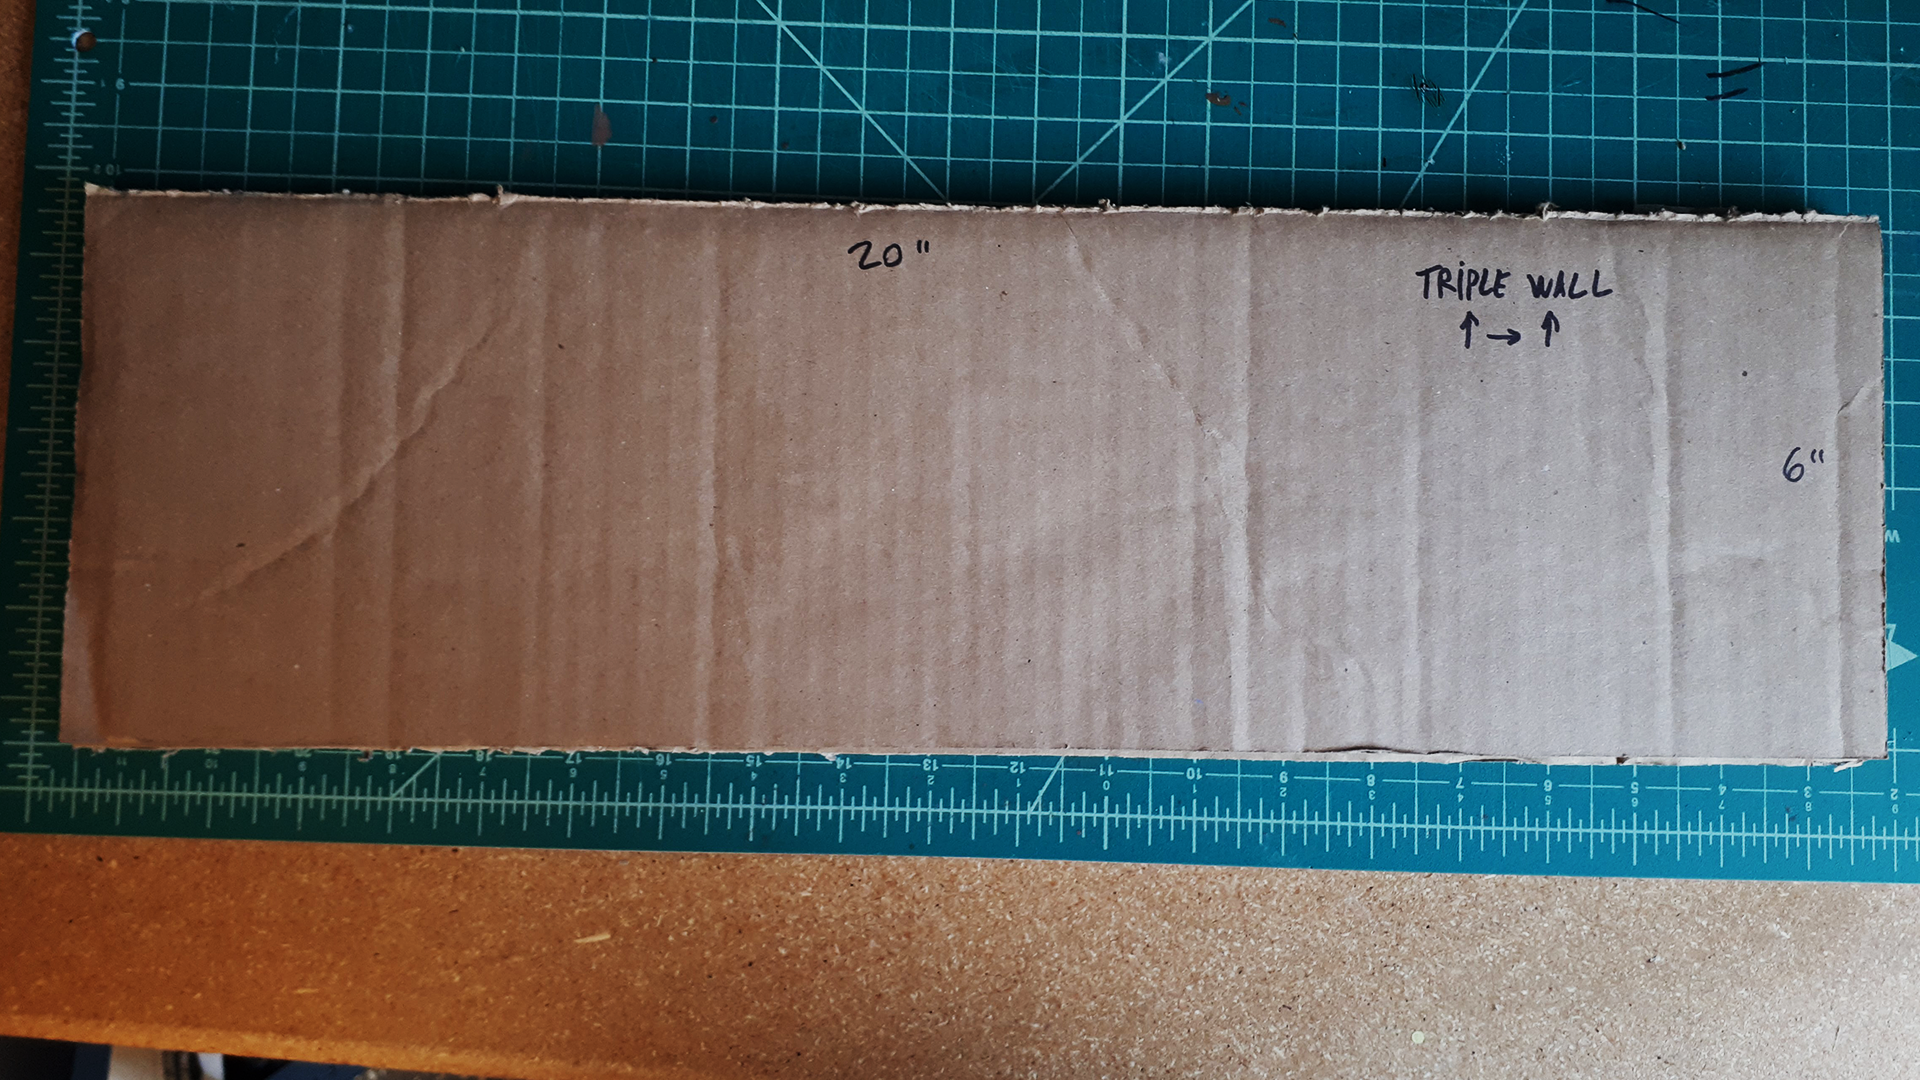
- Large piece of cardboard (enough for 3 rectangles with 20” by 6”)
- Glue
- Box cutter or scissors
- Drawing and painting things!
Instructions
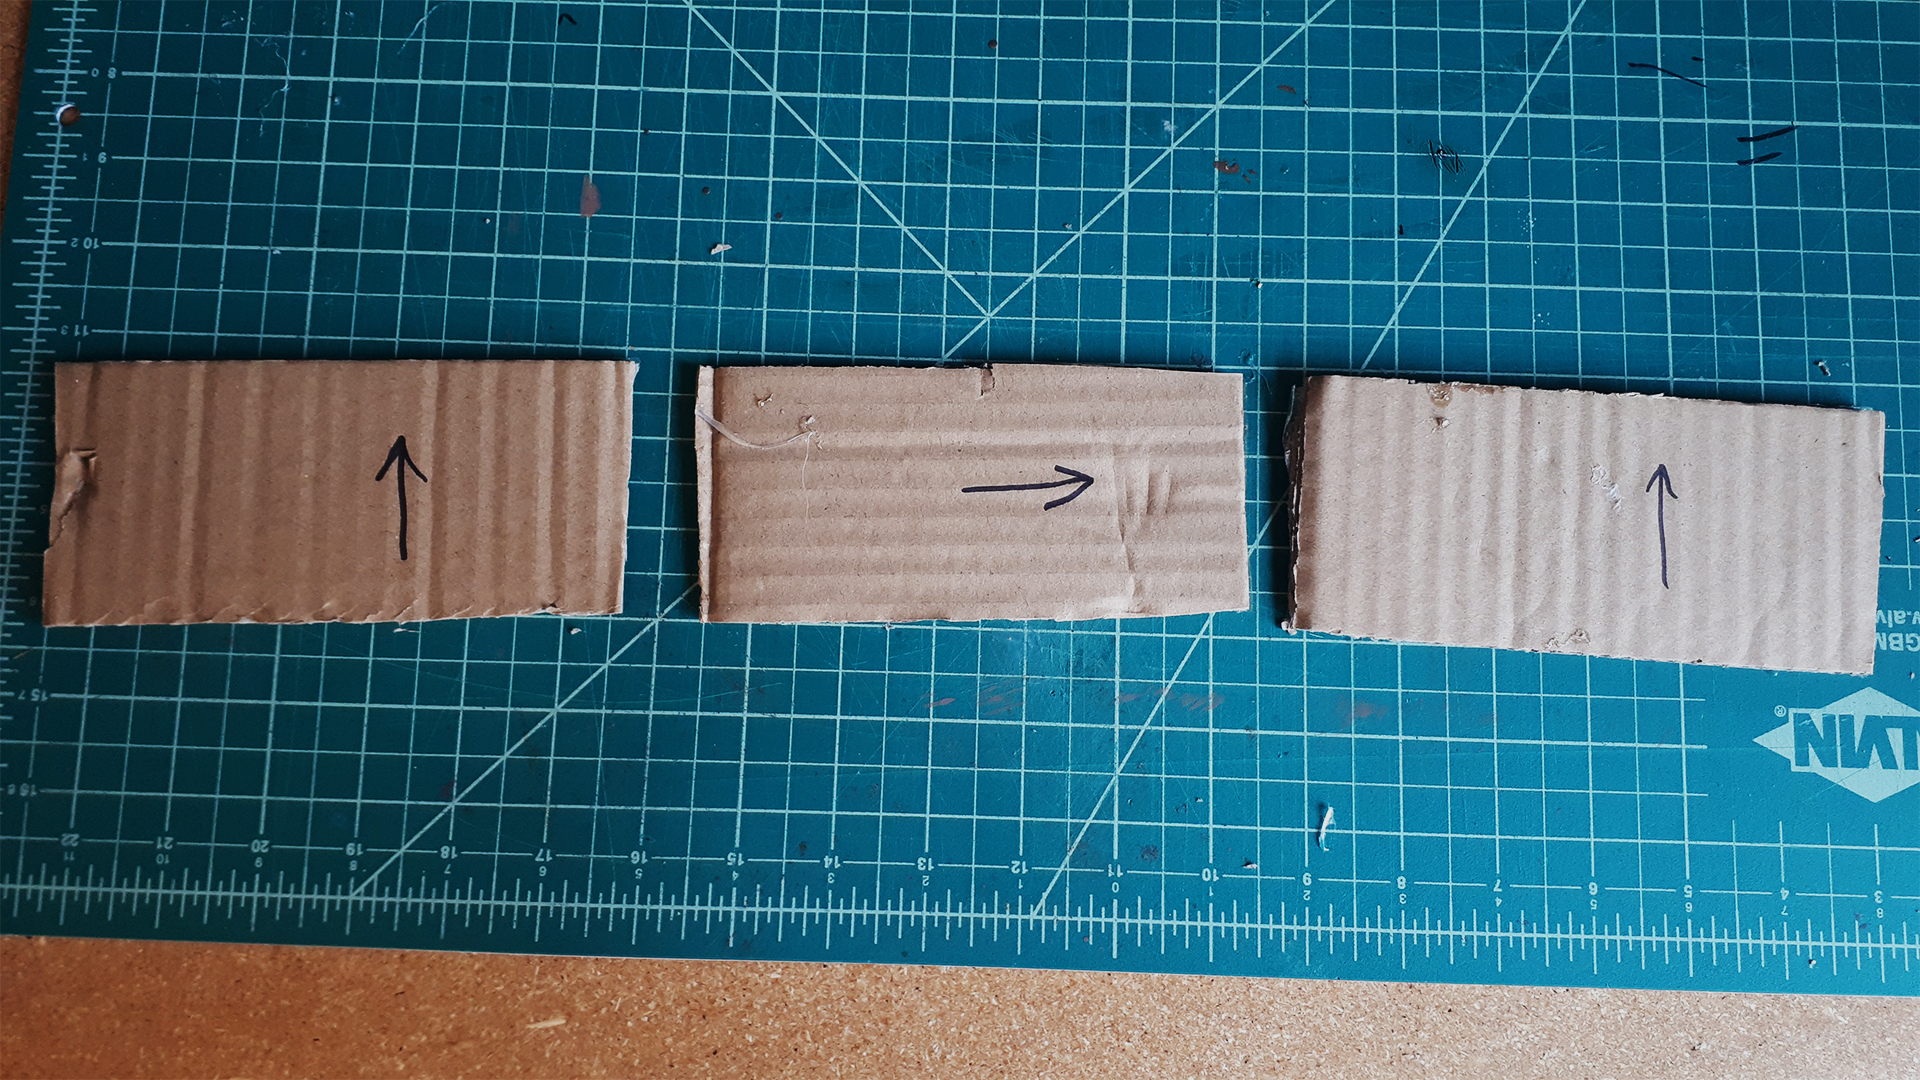
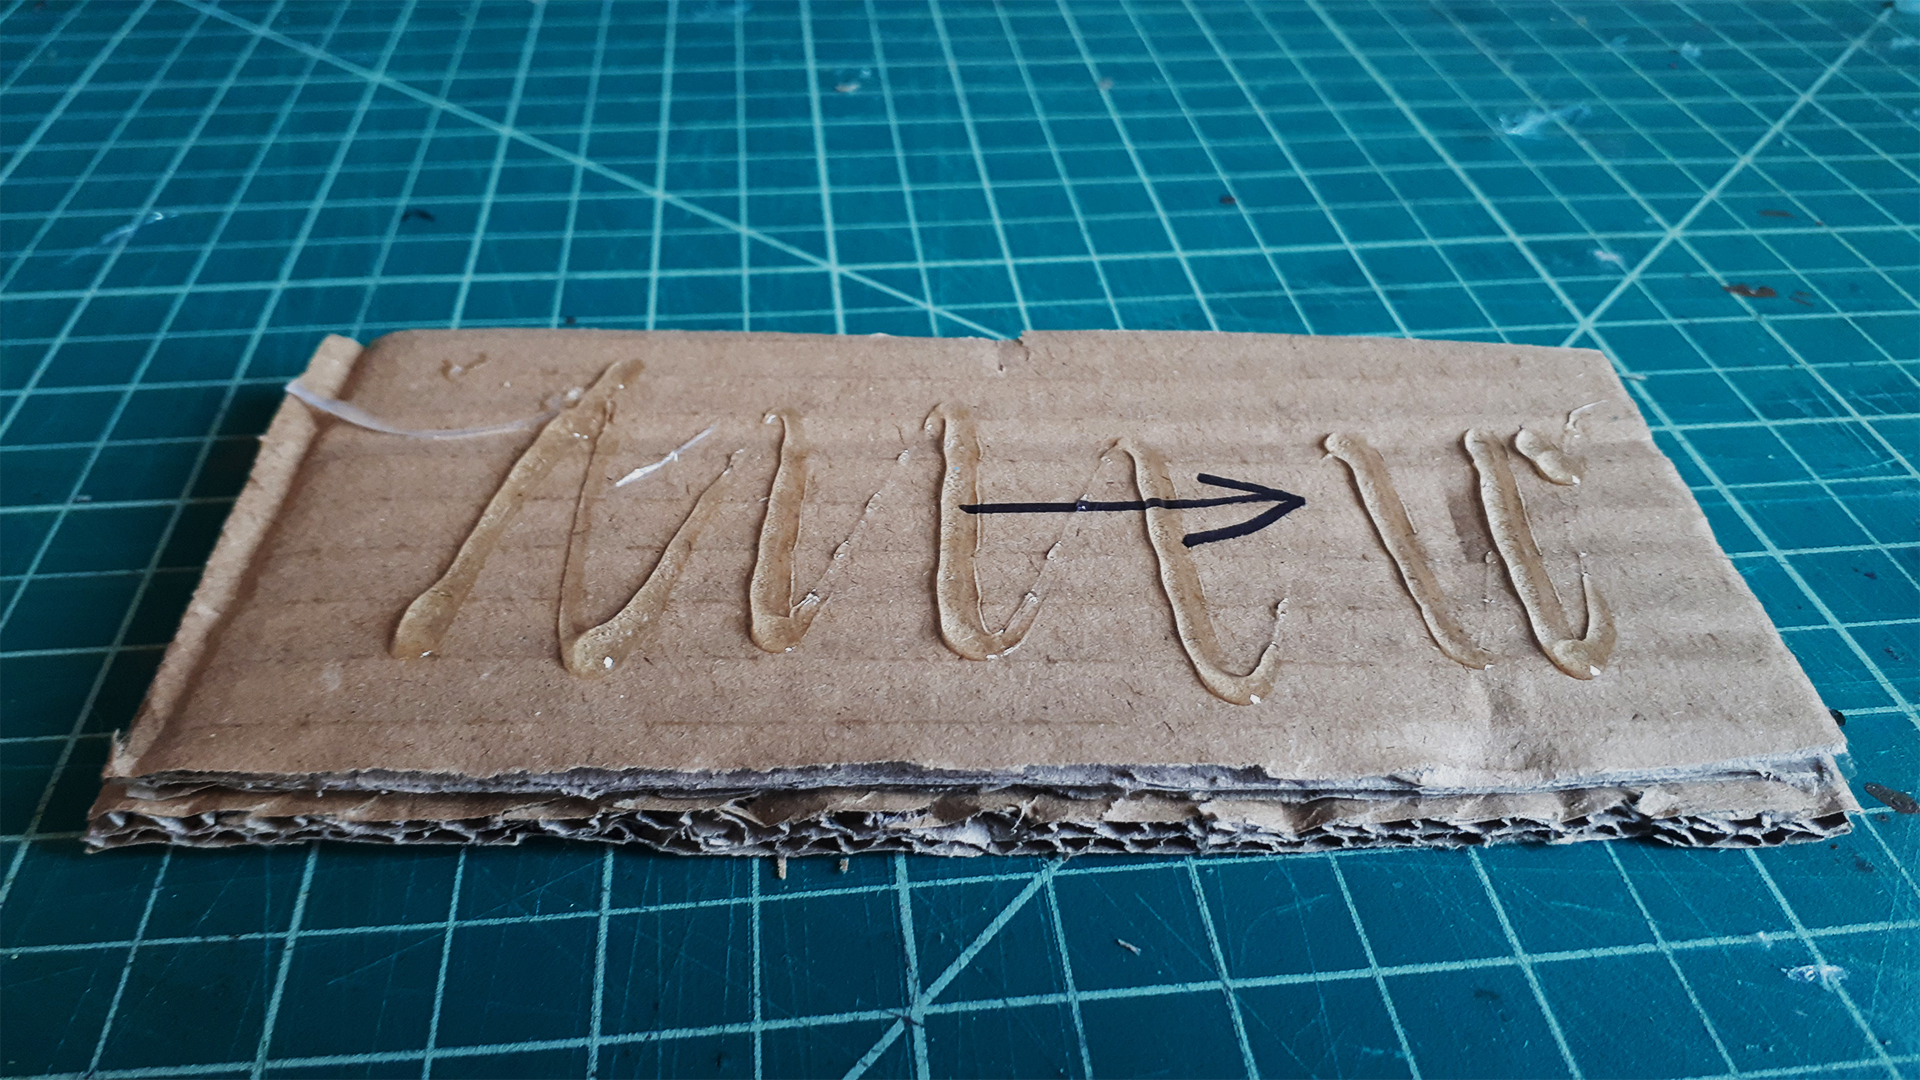
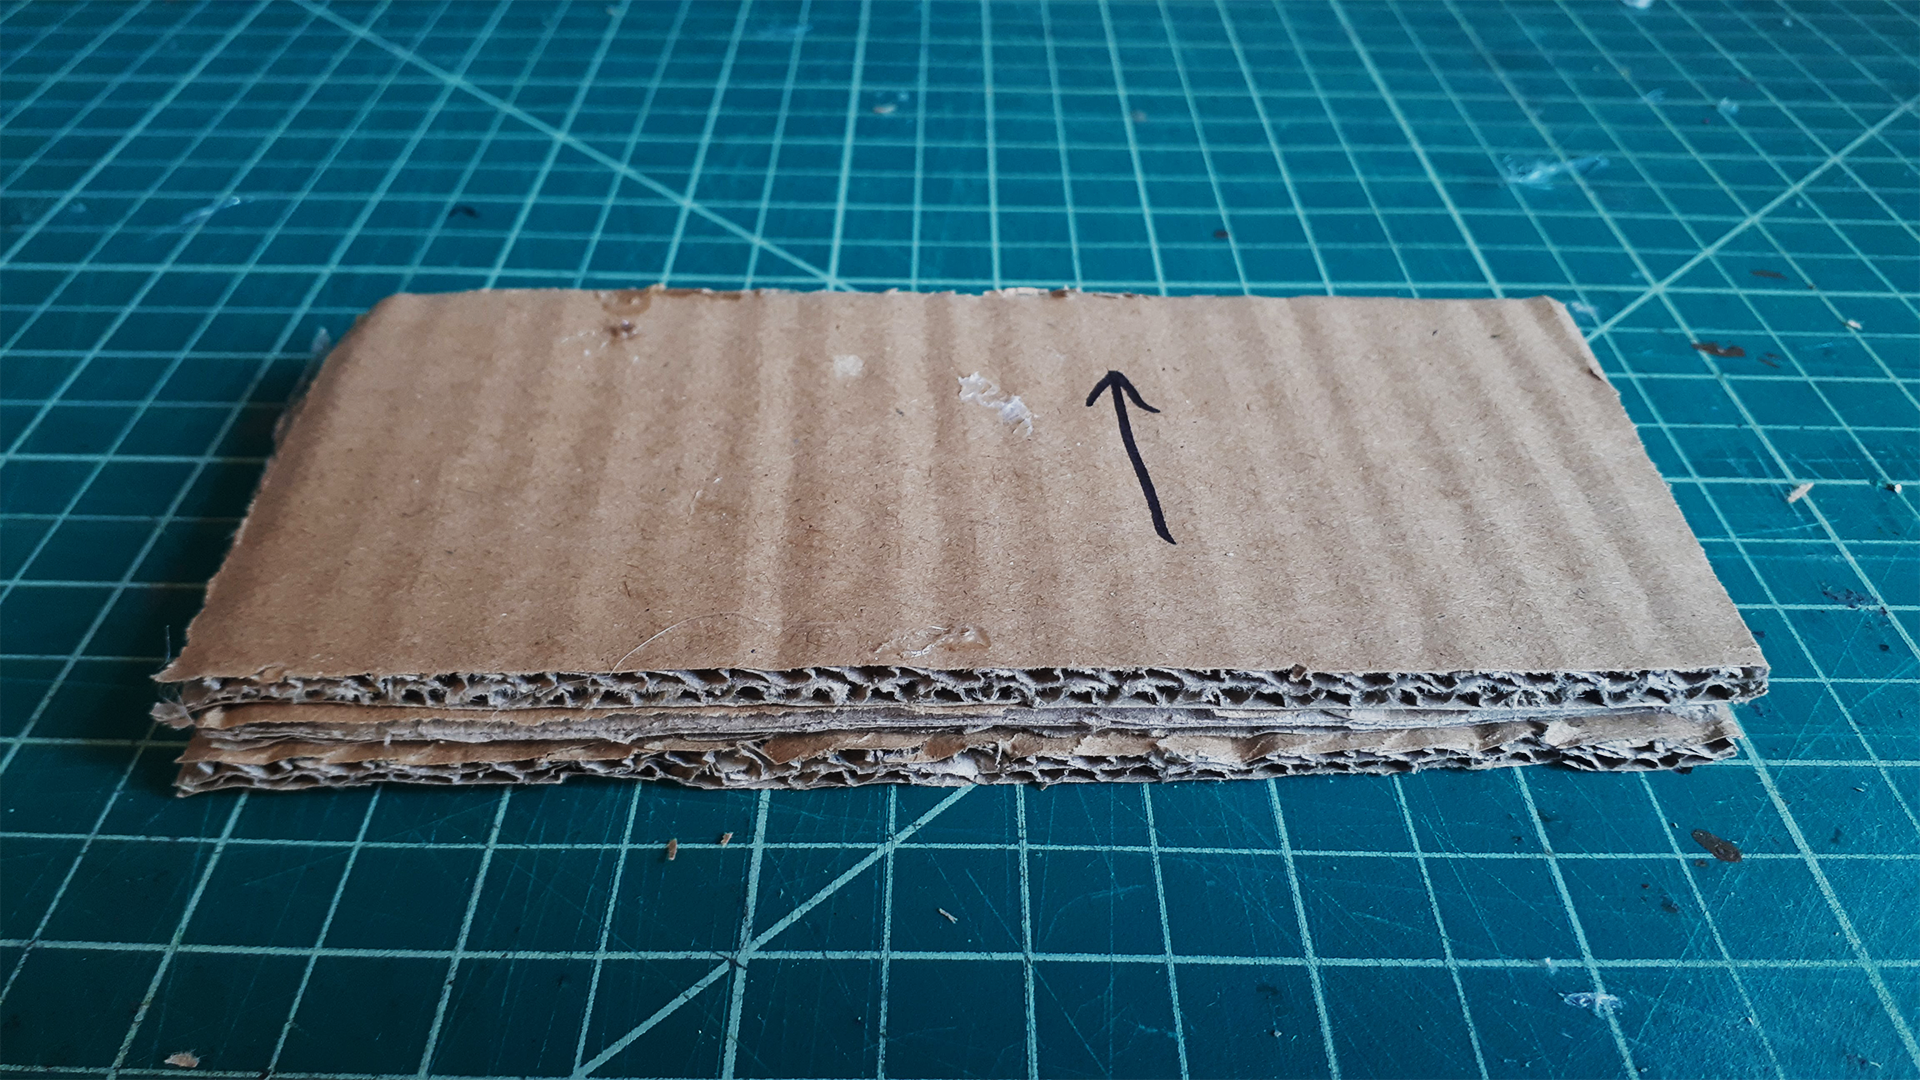
Measure and cut the board shape. It is a 20” by 6” rectangle. This part needs to be strong and resistant, so it’s better to layer it. The top and bottom layers should have vertical flutes. The middle layer should have horizontal flutes. This means that you need to alternate how you layout the rectangle on your cardboard.
To layer them, you just apply glue between the layers and press them together. Here I used hot glue for convenience, but white clue is fine too. If you want more tips on how to layer cardboard, check this video from Adaptive Design.
Customize it!
The pedals
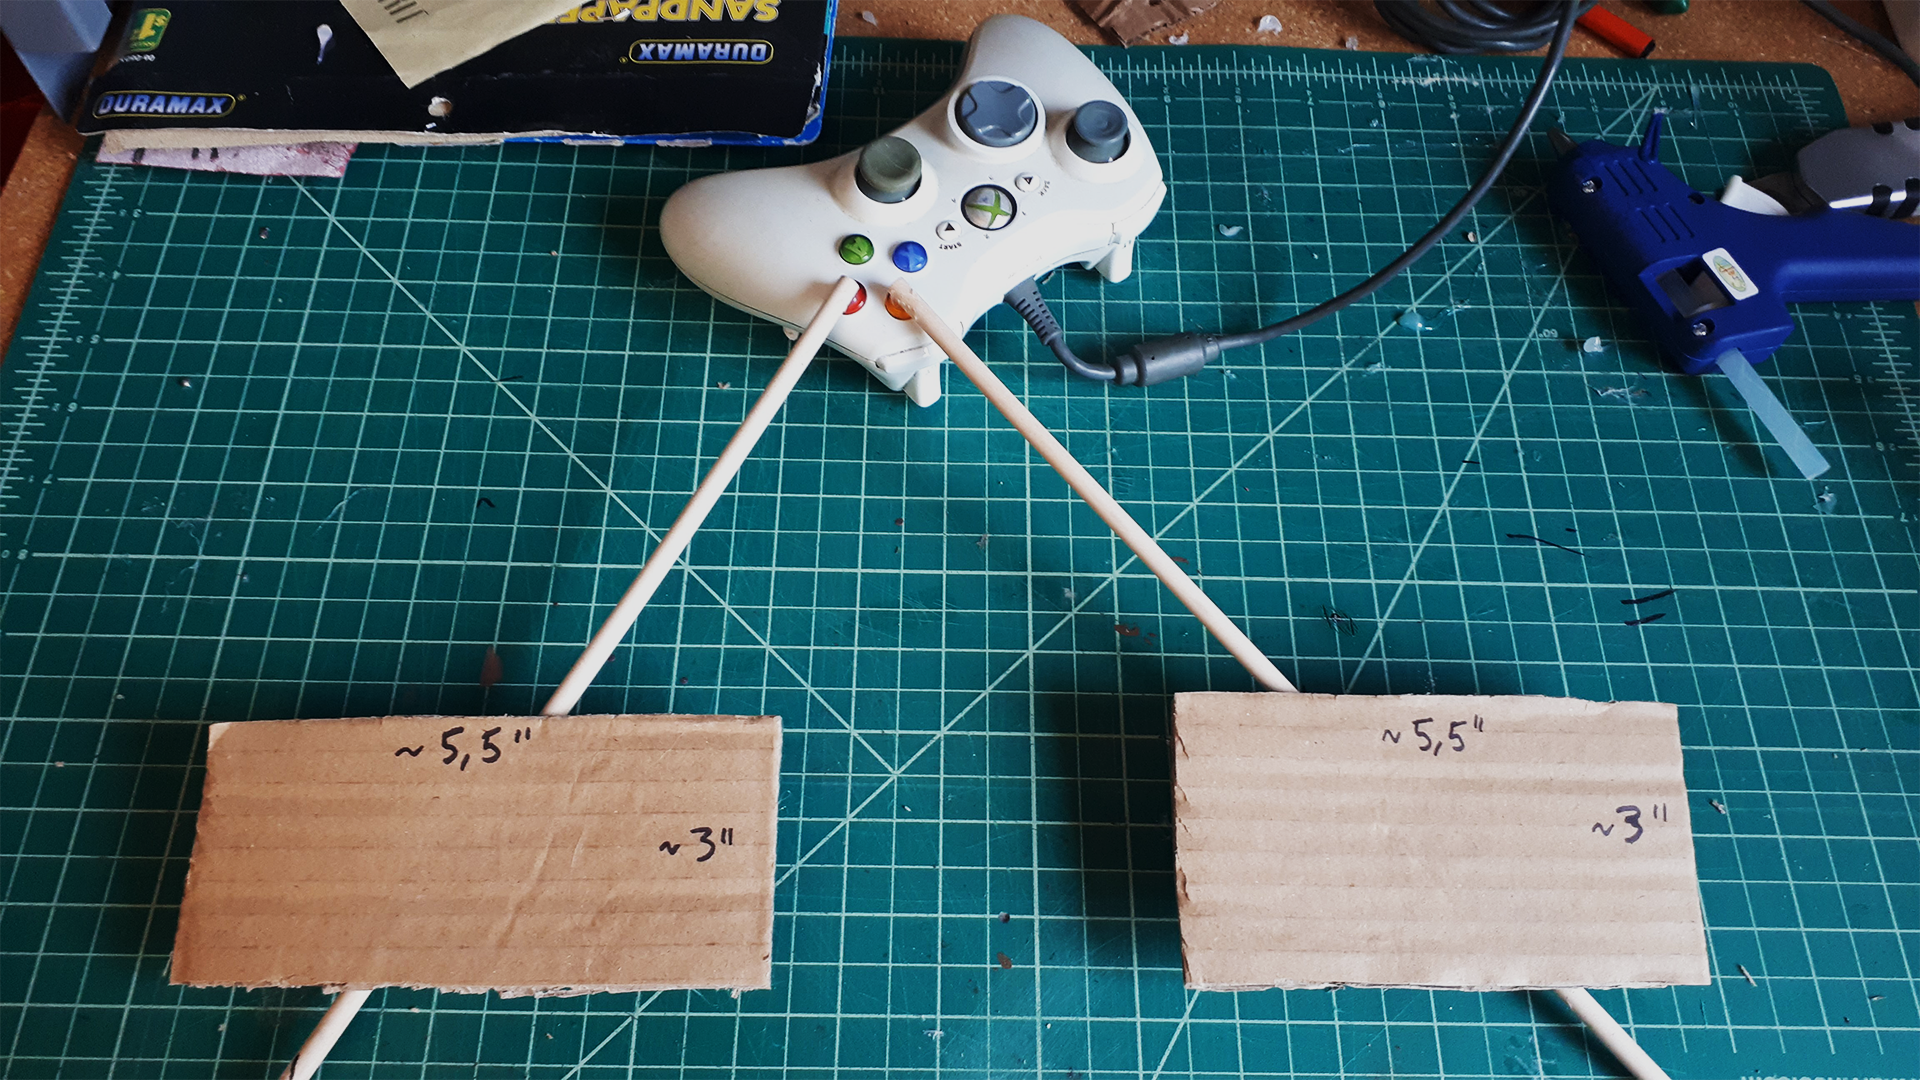
The skateboard deck activates the gamepad buttons via two pedals with levers. These need to be carefully placed and angled to get the right pressure from the player’s feet to the gamepad button. These are also a bit fragile, so keep that hot glue gun nearby for repairs.
Material & equipment list
- Gamepad (compatible with PICO-8)
- 2x 12” dowels
- Hot glue
- 2x Small cardboard rectangles (5.5” by 3”)
Instructions
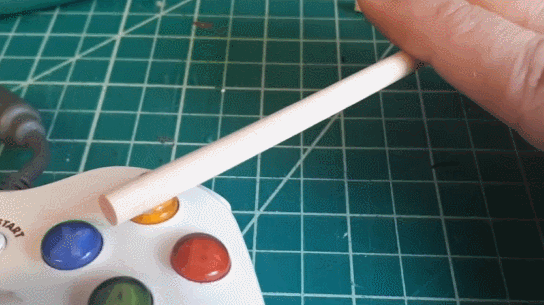
Position the dowel so that one end is on the gamepad button and the other is touching the ground away from the controller. Try pressing down near the ground-touching end: look for an angle that gives a nice button press and release.

Put a bead of hot glue on the button-touching end. Wait a bit for the glue to cool slightly and glue it to the gamepad button. Make sure to keep the angle you found.
Repeat the steps above for the other dowel, trying to find a good angle that creates almost a right angle with the other dowel.
Cut two small cardboard rectangles (5.5” by 3”) and position them over the dowels. try to find a position close to the ground-touching end but that gives a good position for button pressing. Try putting it in the ground and pressing it with your feet to test.
When you find a working position, put a bead of hot glue on the dowels where they meet the pedals and glue the cardboard to it.
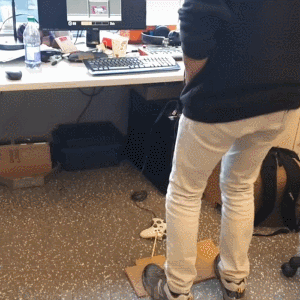
Put the controller and pedal on the ground near the computer, place the skateboard deck over the pedals, and destroy that wall!